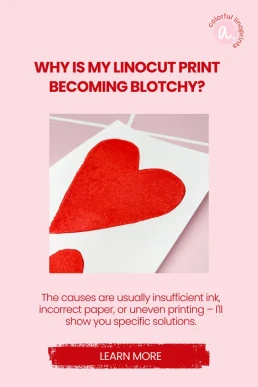
Why Is My Linocut Print Patchy? Causes and Solutions
You carefully peel back the paper – and instead of an even layer of ink, you see light spots, uneven textures, or patchy areas?
A patchy linocut print is one of the most common problems, especially when printing by hand – but it can also happen when using a press. The good news: in most cases, the issue isn’t your design, but your technique or materials.
Here are the most common reasons why a linocut print turns out patchy – and how to fix it.
1. Not Enough Ink on the Block
One of the most common causes of a patchy linocut print is applying too little ink. If you can still see the surface of the lino showing through, there isn’t enough ink on the block. The result:
- light areas across the printed surface
- uneven ink coverage in certain sections
What you can do:
Roll the ink out longer on a smooth surface until it is evenly distributed. The roller should make a slight tacky sound and be coated evenly – thin but opaque. Rolling the surface from multiple angles (not just up and down) also helps!

2. Dust or Crumbs on the Block
Small lino crumbs, dust, jute fibers, or dried ink particles on your carved block can prevent clean ink transfer.
Typical signs after printing:
- small white specks in dark areas
- irregular interruptions
- tiny gaps in solid sections
Solution:
Inspect your block before every print. Blow off loose particles or jute fibers, or gently wipe the surface with a dry cloth or soft brush. Your roller should also be clean.
3. Too Little or Uneven Pressure
Especially when printing without a press, patchy results are often caused by uneven pressure. If you don’t apply consistent pressure across the entire surface, some areas will transfer more ink than others. Even when using a press, this can happen – in that case, a smaller felt blanket can help distribute pressure more precisely.
The result:
- lighter and darker zones
- uneven surfaces
- incomplete ink transfer
What helps:
Work in small circular motions across the entire surface. Pay special attention to edges and corners. Take your time – consistent pressure matters more than speed. You can carefully lift one corner of the paper occasionally to check the result underneath, then place it back gently. This helps you identify where more pressure is needed.
Also, avoid using your block like a stamp – read here what I mean by that.

4. Paper Is Too Thick or Heavily Textured
Not every type of paper is suitable for linocut printing.
Very thick or heavily textured paper (such as watercolor paper) doesn’t absorb ink as easily – especially when printing by hand. The ink may not reach every part of the paper’s surface.
Typical result:
A slightly but evenly patchy print, even though ink application and pressure seem correct.
Solution:
Use smooth, untextured paper with moderate weight. For beginners, a reliable printmaking paper that works well for hand printing makes a big difference. I recommend paper around 160 gsm.
Printing thick paper is easier with a press, but even then there are specific requirements. Read here whether you really need a press for linocut printing.
5. Water-Based Ink Dries Too Quickly
Water-based linocut ink is popular – but I’m not its biggest fan, sorry! It has more than one major drawback: it dries relatively quickly.
If too much time passes between inking the block and printing, the ink may already begin to dry. This can lead to:
- uneven ink transfer
- a grainy surface
- patchy results
What you should keep in mind:
Work efficiently after rolling out the ink. Don’t apply it too thinly, and avoid long pauses between inking and printing. Or even better: switch to oil-based, water-washable inks! You’ll find all my recommendations in my tool list.

Conclusion: A Patchy Linocut Print Is Not Random
If your linocut print turns out patchy, it’s almost always due to one of these factors:
ink amount, cleanliness of the block, pressure distribution, paper choice, or how quickly the ink dries.
The key point is:
It’s a technical issue – not a talent issue.
Once you identify the cause, you can make targeted adjustments and your prints will become much more even. Sometimes several factors interact at once. Paper, pressure, and ink influence each other more than many people realize.
Many beginners understand the theory quickly but feel uncertain when applying it in practice. Details like ink consistency or pressure control become much easier with structured guidance.
With some practice – and the right materials – clean, even results are absolutely achievable. And once the technical foundations are solid, you can focus entirely on developing your own style.
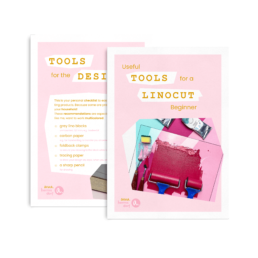
Linocut Tool Guide
Still unsure which tools and products you need for your lino printing starter kit? Just download my guide with product recommendations for linocut beginners – on 6 pages I list all the materials and tools I need to make my colorful prints – and you can do it too!